Showing posts with label easy. Show all posts

Tuesday, January 27, 2015

Apples


           While late January is always one of my favourite times of year- the promise of Spring is a faint yet persistent whisper in my ear- it does come with a modicum of sadness. You see every fall for the past few years my Father In Law has procured several boxes of apples for our little family from his friend the orchardist- I wrote about our apple picking adventure here a few years ago. This time of year- each time I reach into the wooden box out on our deck I can't help but notice the dwindling number of Okanagan goodness- yes it's true we are running out of apples!

           We are so spoiled by these crisp juicy delights- even in the "deep" of winter one can taste the Summer sunshine- if you close your eyes and stand in front of a heater while biting into one of these apples you will surely be transported back in time. Our family feasts liberally- apple sauce being a constant on our table- sliced apples grace the lunch boxes daily- apple cake is gobbled up regularly.

          Apple sauce is quite frankly the easiest ting on earth to make- why people buy it at the store has always confounded me- so I thought today I would share one of our family's favourite treats! Like I said it's ever so easy- all you need is about five apples and some cinnamon- OK well I also add in nutmeg and ginger- so yummy!

           To make apple sauce gather together your ingredients-5-6 apples- cinnamon- nutmeg- ginger- as well as a large sauce pot and about a half a cup of water. Peel apples and dice them into generally even cubes- about and inch square- throw diced apples and a few healthy shakes of spices- about a teaspoon combined- into the sauce pot along with the half cup of water. Place covered on stove at medium heat- cook for about twenty minutes- carefully test firmness of apples with a fork- once mushy the mixture is ready. Remove from stove and allow to cool- with a potato masher gently mash the cooked apples into sauce. We like ours a little chunky so I don't tend to over mash it.

       If you are making apple sauce for a new eater you can omit the spices and also run the sauce through a sieve for a more consistent texture

        On a chilly afternoon after school nothing is better than walking in the door to simmering apple sauce- trust me when I say your home will smell amazing! Just a hint because the apples will be pealed- appearance is not all that important- ask your grocer for seconds or damaged apples- fruit that is past it's peak is perfect for this dish- be sure to ask for a discount! Enjoy!


 PS- while I know apple sauce is such a basic thing I find it really is an underrated snack- perfect as a topping on oatmeal or all on it's own. When we make foods like this from scratch we eliminate the middle man- we eliminate the plastic lining on a metal lid going into a landfill from a store bought jar- we eliminate in fact the use of a new jar all together- the energy that went into producing the packaging. The simple act of making apple sauce in fact has multiple benefits to the planet! Be sure to take a re-usable produce bag when purchasing your apples- try to compost your peels or use them for apple cider vinegar! All the small steps we take towards living plastic free really do add up!

Wednesday, October 23, 2013

Crafternoon: A Holiday Craft For Non- Crafters


         Around these parts we love a holiday- one of our favourites is Halloween- the perfect combination of celebrating the spooky and fun. It then almost goes with out saying that for every holiday we have a craft- a little coloured paper and a glue stick goes a very long way. I personally like crafts that are simple and easy and that my Littles can participate in as well- so paper crafting is the perfect medium. Yesterday we sat down with a stack of Halloween appropriate papers and got crafting.


         While the Littles were working on their awesome Jack-O- Lanterns for the front door I decided to make a quick and easy Halloween banner to hang along side. This little banner is my craft for the non- crafter- it is just that easy. To start with cut two pieces of 8.5"x 11" pieces of paper in half- we will be using three of these pieces- cut a triangle out of one of the short ends- this will be the bottom of the banner.


          If you have decorative scissors- even pinking shears will do- cut a smaller piece of coloured paper to fit inside the banner piece- about 4"x5" and glue in place- I chose this grey shade to contrast with the black- effectively creating a double matt.


        Trace or draw out the letters-B-O-O- this will be your scary message on the banner- I used stencils but if you are great at lettering try free handing it. Cut out and glue the letters in the centre of each contrasting square on the banner piece.


        Allow the glue to set up and possibly weight down the banner pieces with a book for an hour or so to prevent curling- punch small holes in the top corners of each banner letter and slip onto a piece of string- I used Butcher's Twine but ribbon or jute would also look really cute. Hang to admire!


        I find there is so much available to consumers to purchase around popular Holidays that often it is just too overwhelming- and completely unnecessary. Simple decorations made with humble materials can provide just as big of visual impact as their plastic store bought counter parts. To me Halloween is such a simple childhood event and this little banner is sure to delight!

Tuesday, May 21, 2013

Craft Camp: No Snag Hair Elastics


       Last week I noticed that several of my friends had pinned these really cute DIY hair bands on Pinterest- of course I pinned them as well- mainly because I always need hair elastics for myself or Miss Lo. One of these friends had the great idea that we hit up our local fabric emporium - DressSew on Hastings St for you locals- and we loaded up on the magical elastic ( really meant for underwear and bras) with which to make enough hair elastics to last us for an eternity! At .25 cents a metre how could we say no to every colour available?


      So here's the deal- instructions on the original blog- love you madly- instruct you to measure your wrist and add and inch on each side- which for me would be six inches for my wrist plus two more- should be eight inches- perfect! So measure your wrist, add two inches and cut elastic accordingly- easy!


     Next up- tie a knot- yes if you can tie your shoes you can do this craft- just tie a knot and leave a little tail sticking out the end of the elastic. Now you are done- seriously how easy was that?


        Optional- place onto a piece of card stock cut accordingly to the size of your elastics - give away as gifts- but only to people you really like! These would make great take home goodies at a birthday party, perfect hostess gifts or stocking stuffers for sisters and Moms.

Thursday, January 24, 2013

Rainy Day Crafts


     Oi! What a day! I know things could be MUCH worse for us weather wise- at plus 6 with rain we are far better off than any of our fellow countrymen to the East- and still I complain. I was not designed for weeks of grey sky or what is commonly known as winter here on the coast- I think I was born in the wrong continent- I possibly belong in Australia. I admit this is the toughest part of the year for me- the aforementioned rain makes me just want to hibernate and eat large amounts of bread smothered with melted cheese- sounds good right? 

    The only problem with this plan is these children of mine will not allow this to happen- stay inside? Yeah right I have a better chance of bumping into Jason Priestley- which actually just happened to my friend Kim Manky who lives in L.A. You can also forget about the large amounts of bread smothered in melted cheese- any indication that I am about to eat anything they are at my heals claiming to be starved- apparently I don't feed them enough! At any rate the option of me reclining on the sofa for the rest of January is non existent and so into my studio I go- on the hunt for something- anything that will engage them for longer than 4 minutes( the amount of time it takes them to eat a purloined cheese melty).


     This project could not be easier- it is a project that even my sister might attempt to do with her wee ones- that easy! Today we are channelling warmer days and creating a wall full of spring butterflies- a pop of bright colour and a spot of hope on an otherwise grey day! Our jumping off point was these awesome bug bodies that we found at Collage Collage a few weeks ago- I only bought three and immediately wished I had grabbed a few more- enter in the clothes peg bodies.


      As you can see the pre-made bug bodies have slits into which you slide your wing selection, all one does is accordion fold a few pieces of tissue and slide them through the slot- finish it off by fluffing up the wings and adding pipe cleaner antenna. The clothes peg is even easier- all you do is gather a few pieces of tissue in the middle, along with the pipe cleaner for antenna and clip with the clothes peg! How easy is that? Of course from here you can decorate the wings with watercolour paints or markers- we also painted the clothes peg bodies to make fancy butterflies!


      Once we had enough butterflies we had to decide where they would live- we have this dull grey column in our living room- it is supposed to keep the building up or something but man is it ever ugly! It was decided that the ugly grey column needed a face lift and so up went our beautiful spring butterflies! We are very pleased with the result- not only did this project manage to engage us all for an hour or so but we have the added bonus of a new art installation to brighten up a dull corner of our living room. A promise of spring and with it an end to the rain!

P.S. I am not sure what this guy is- The Boy made him at school today- but dang if this isn't super awesome!


Thursday, October 18, 2012

Fall Bunting

 
     With all this discussion of cozying up for the winter it is taking every fibre in my being not to start pulling out the Holiday decorations- and the Twinkle lights- it is so dark out these days! It's true I have a problem- I am really aware of the retail driven obsession to go big for Holidays and to start pushing them as soon as one is over- Christmas decorations have been in Costco since the end of August- and so I am resisting putting up Twinkle lights until after Halloween! Instead I turned to my giant pile of scrap fabric and decided to make a moody little fall banner- next week I can start dressing it up for Halloween and after that I can bring out my Winter decorations- then Solstice and Christmas- yes we celebrate it all!

    I have been asked a few times how to make banners- and it is super easy- I thought I would share how I make a very simple one sided banner. This can easily be modified to be double sided- it is a great way to use up scrap fabric! Skills needed for this project- adequate scissor know how, pinning and sewing a straight seam.


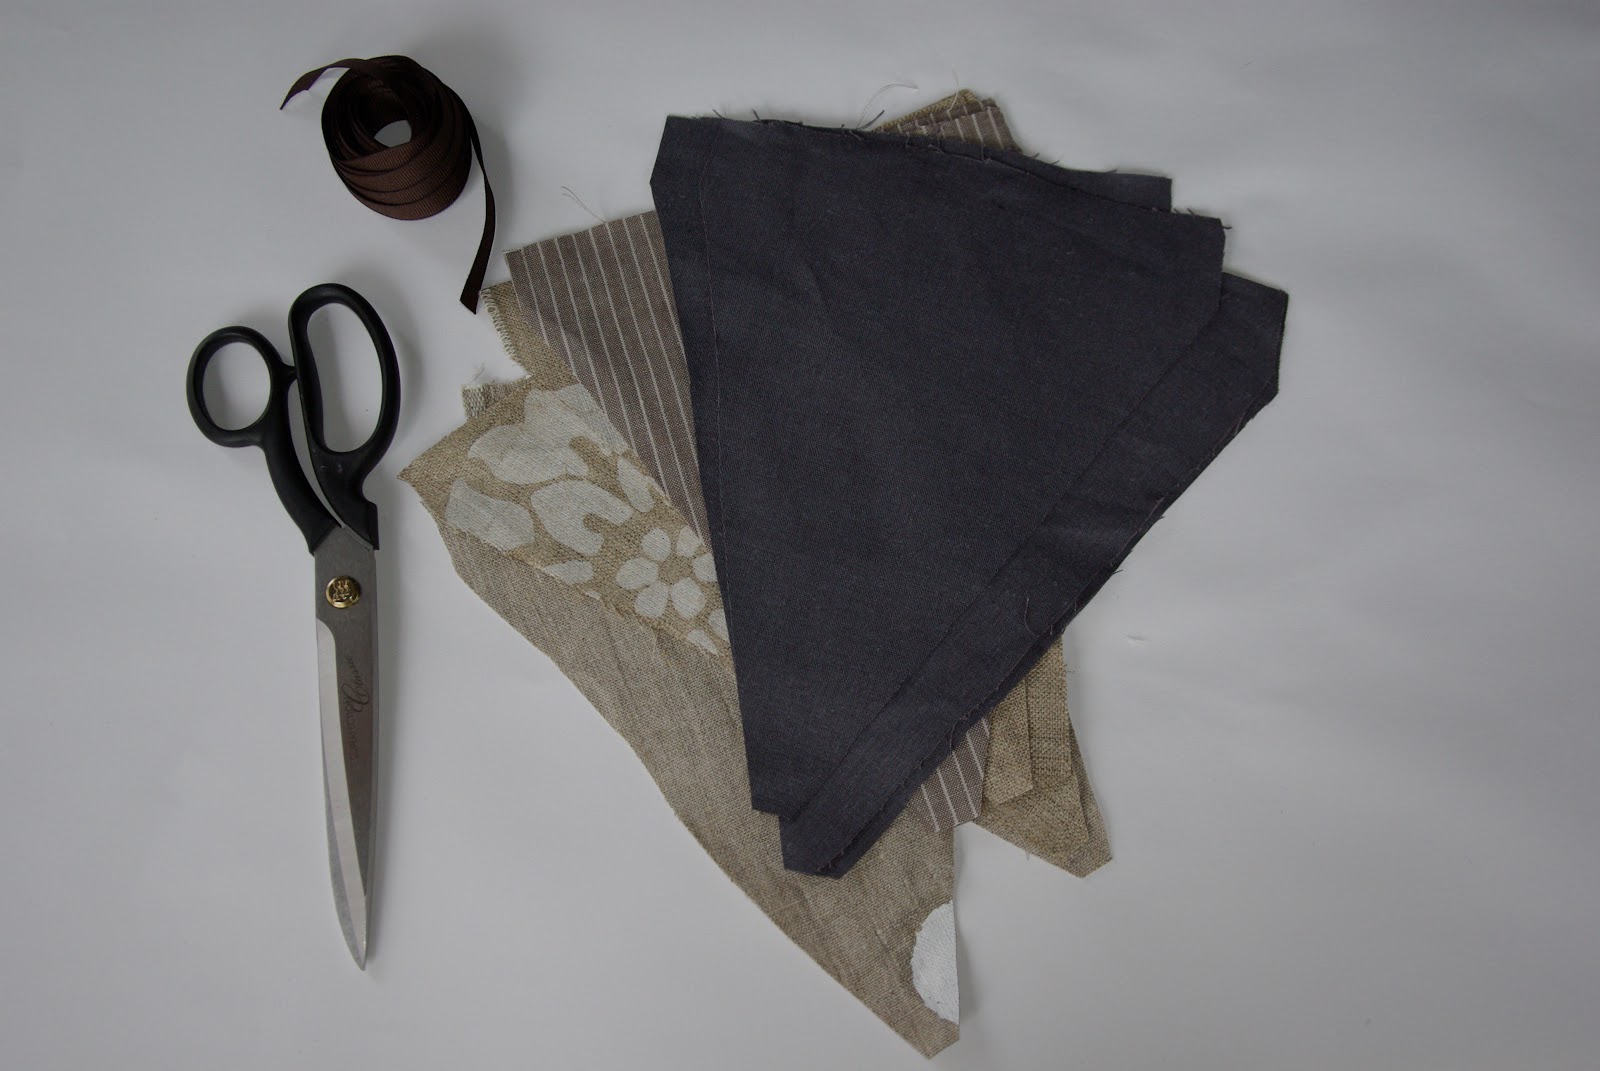
       Draw out your pattern piece- Basically a triangle that is 9 inches on the long side and 7.5 inches across the top- I like to square the edges off on the sides as you will be folding and ironing a flap later.


               Using the pattern cut out about 12 flags- double that amount for a double sided banner


      On the back side of the flags fold over the squared top and iron- this creates a channel that the ribbon will run through. Pin the ribbon in place- space your flags as pleases you- I like them right together.

 
     Still on the back side of your Fall Bunting sew a straight seam- catching the ribbon in the stitching as you go- don't forget to back stitch on either end- clip hanging threads. Press everything smooth and hang to enjoy!

 
      Directions for Double Sided Bunting

a) cut out equal amounts of flags- ex. 20 pieces of fabric will make 10 flags
b) place two triangles together. Stitch the long edges together with a 1/4 inch seam allowance.
c) Turn the flag right side out- press
d) Fold the flag's top edge in by 1/4 inch. Press. Fold again 1/2 inch and press- topstitch to make a 1/2 inch casing- the ribbon will run through this


p.s. Today is my Dad's birthday- so Happy Birthday to this guy!


Wednesday, September 26, 2012

In My Kitchen


        In my kitchen we are not fancy or complicated but we are healthy- most of the time- and we are really all about ease and basic ingredients! I love to cook but the less time spent in the kitchen the better- I would rather be outside and so for all those families thinking about school lunches or snack times ( a first for us around these parts this year) I present to you my really easy friendly granola bar recipe. Now I am not sure why kids are completely obsessed with those tiny pre- packaged cardboard like treats that pass as granola bars but rest assured not only is this a litter free treat ( no wrappers) but it can be tailored to your liking- crunchy or chewy- however you like it!


Easy Peasy Granola Bars

I adapted this recipe from my mom's original granola recipe- plus made it nut free for The Boy's school snacks. You can tailor this to pretty much any combination you want- add slivered almonds, peanuts, walnuts or coconut - as long as it adds up to a cup of nuts and seeds of some sort.

The Goods

3 cups rolled oats
1 cup raisins, or dried cranberries or currents
1 cup nuts and seeds
1/4 cup pumpkin seeds
1/2 cup flour
1/2 cup honey or maple syrup
1/2 cup brown sugar
1 egg beaten
2/3 cup melted butter
1 teaspoon vanilla

The Deal

combine all the dry ingredients together, melt butter or if you are in a pinch you can use olive oil- add to mixture along with beaten egg and vanilla. Combine thoroughly. Press firmly into a greased 15x10 pan. Bake at 350 for about 20 minutes or until edges are lightly brown. If you want a crunchier bar- leave in the oven while keeping a very close eye on things for another 5 or so minutes. Do not take your eyes off your bars otherwise they may burn. Cool and cut into squares or bars- enjoy with a cuppa tea or for the under five set and big glass of milk!


ps- as you can probably tell from the picture above there are chocolate chips in this particular batch- I say if a hand full of good quality dark chocolate chips is going to get your kid to eat this granola bar then go for it!


Wednesday, July 25, 2012

Pillows are actually a girls best friend!

       It is no secret that I am a fan of textiles, textiles in any form really soften up a room and add a pop of colour or pattern when some is needed. We live in a rental and so changing things like wall colour is a really big deal- not only would we have to get approval for the colour change from the building manager before painting we would obviously have to change the walls back to white before we leave. Truth be told I really like having white walls as all our furniture is fun and pops on the white, our last place had a putty colour on the walls that just made everything look dirty, white is clean and modern allowing our furniture and art to really stand out.

     I thought I would share one of the easiest sewing projects that you will ever try and succeed at- behold the custom throw pillow. These can cost big bucks in designer stores- think pillows that cost more than shoes. Of course these pillows are amazing and beautifully made however when one lives with children under the age of clean hands $200 accent pillows may not be the way to go.  A visit to your local fabric store will yield a plethora of fantastic fabrics at a comparativly low cost- for example I scored this sassy hot pink zebra remenant at Fabricanna for $3.98- at a half yard of fabric it was the perfect size for a pillow cover.


     For this project you will need:

- about a half yard of fabric- about 18" by about 42"
- a pillow form- these can be purchased at most fabric stores
- buttons, ribbon or other embelishments
- matching thread


      Lay pillow on the length of fabric, basically you will be making an envelope for the pillow form, use the form as a guide, making sure you have enough yardage but not too much- I like to leave an extra 1/2" as a seam allowance on each side. For example if your pillow form is 16" add a 1/2" on either side- your fabric should measure 17"wide by 42" long.


    Hem the short ends of the fabric by folding the fabric over about half an inch and ironing, fold over again and iron, straight stitch on your machine. Take the finished ends and fold the fabric so that they overlap in the middle by about 2 inches on each side- this creates the envelope and forms the closure of the pillow cover.


         Pin the edges of the pillow on the two open sides( the folded sides do not need to be sewn)


    Straight stitch the two sides together- in the middle of the cover you will be sewing through three pieces of fabric where everything overlaps. Snip off the corners- this is the only time anyone will tell you it's OK to cut corners! Take out pins, flip pillow cover right side out and push out corners with something sharpish- like a pencil or knitting needle. Give your new pillow case a good iron and make sure everything is nice and crisp before slipping in the pillow form.


       To finish the pink pillow I added buttons which are purely decorative. You can use any manner of closures, such as ribbons for ties or just leave the back plain as I did with the smaller pillow.


    I now have a very happy little girl with a freshened up bed, the slip covers can come off and be washed as needed which makes for a happy Mamma! Or changed  out when her tastes change- although quite frankly who would ever grow out of pink skulls? I also have requests from The Boy for a pillow covered in anchors- these affordable throw pillows means everyone is happy and I still have money left to buy shoes. A win- win situation I say!


p.s. remember what you learned in Sewing 8- always sew your seams on the inside of your item- this means when you are working you will be looking at the back of the fabric that no one will ever see!