

Hello Friends! Here we are at the start of a bright, shiny week once again- I had such an over the top weekend filled with creativity, family, tutus, pancakes and fantastic friends that I am ready for this week! The main event for me was my stint as a visiting artist over at Opus Framing and Art Supplies- as promised I am going to share the three awesome projects I presented as well as my list of go- to art supplies that are in my arsenal.
Since it tis the Season to get creative one of the projects I presented this weekend was very basic relief printing onto greeting cards- a subject near and dear to my own little heart. This is one of my favourite projects to do with the Littles if we need a birthday or Holiday card- it is shear magic as well as being very simple to do!
The Goods:
Scratch Foam Styrofoam sheets
regular pencil
brayer (the rolly thing with the handle)
rolling pin or empty wine bottle
Speedball water based printing ink
pallet (a piece of plexi will work)
smooth card stock

The Deal:
1) Cut a sheet of Scratch Foam down to just slightly smaller than your card stock, using a regular pencil draw on your design.
*tip- if words are part of your design remember to draw/print them backwards- when they print they will print as you normally would read them*
2) Squeeze out a moderate amount on ink onto a smooth washable surface like a painting pallet or piece of plexi glass- roll out the ink evenly until it has the texture of an orange peel and the brayer is evenly coated- you do not want think goopy ink.

3) Taking your brayer, which is evenly coated in ink, carefully roll it over the surface of your drawing on the Scratch Foam- again trying to keep the distribution of ink even.

4) Once the drawing is evenly inked up place a card on top- try to get it centered but don't fuss too much about it- place a cover sheet of plain paper over top (this is just to keep things clean)
5) Press everything in place- the sticky ink should prevent your card from sliding around) and roll over top with the rolling pin or bottle exerting even pressure as you go over everything a few times.
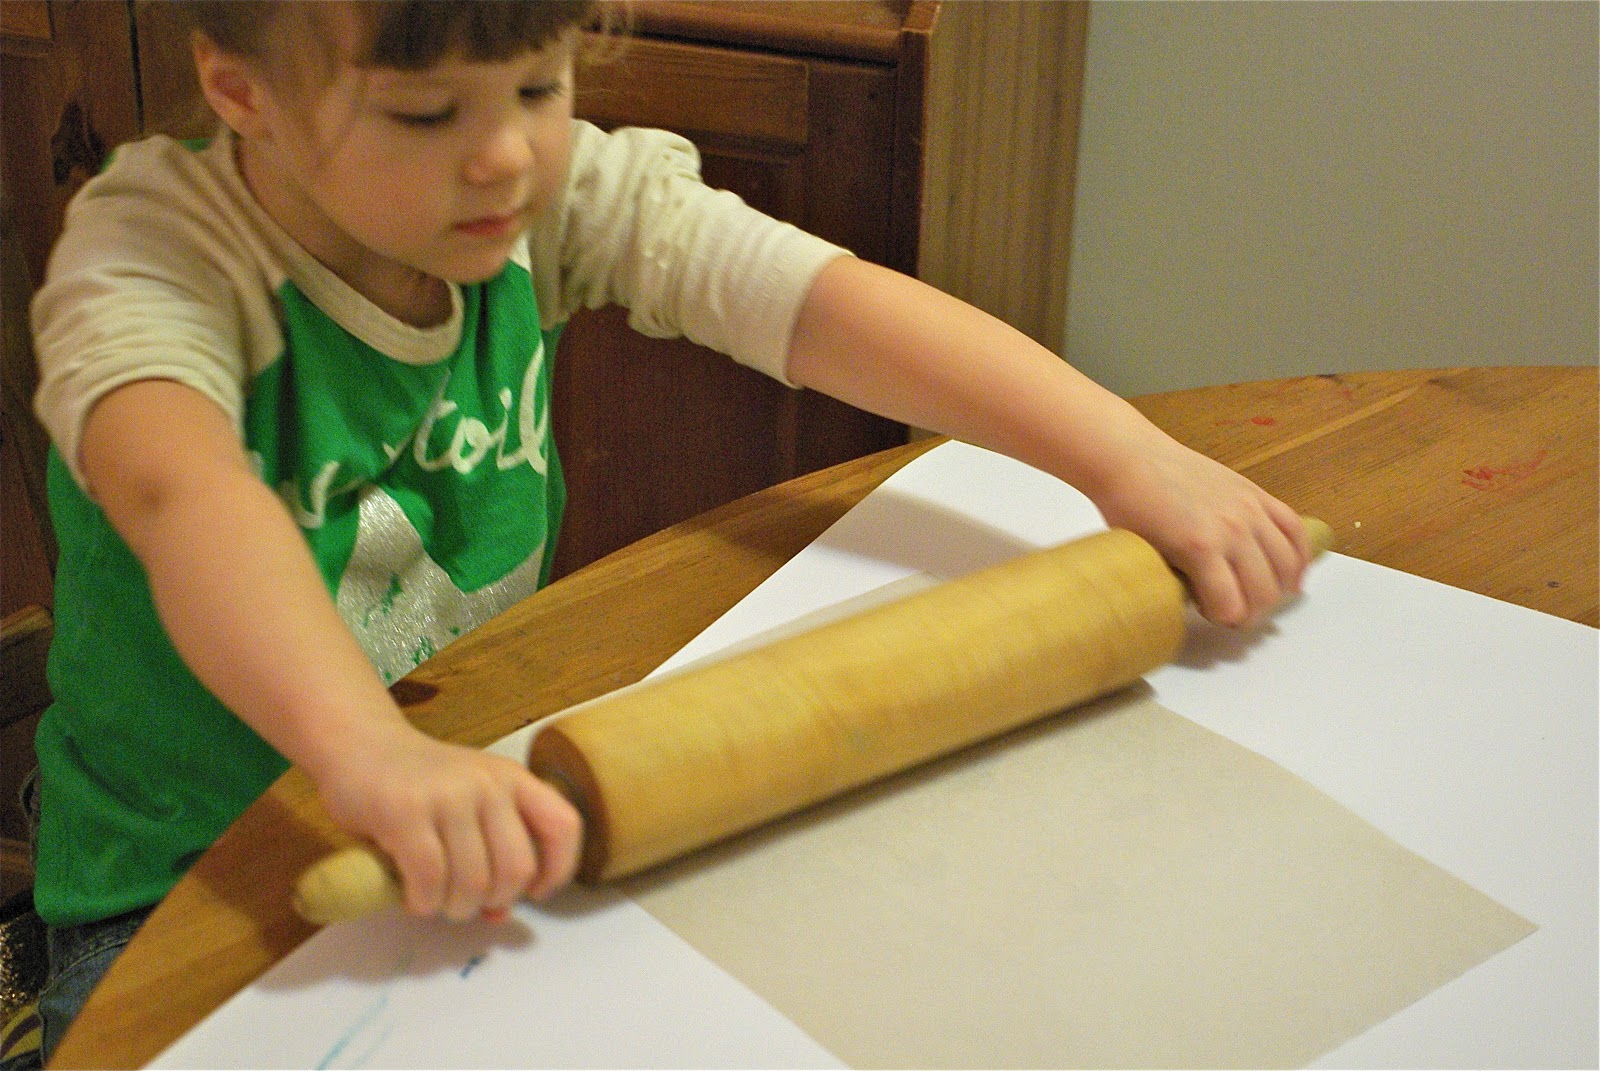
P.s. please excuse the action shot- Miss Lo was really getting into her work!

6) Peal off the original sheet of foam and set your card aside to dry- ink it up again for multiple cards- you should be able to get at least six from one drawing!

7) Finish off your Masterpiece with some embellishment or stamped greeting- instant Holiday keepsake!

I had a great time sharing my passion with a handful of equally interested folks- thank you to Andrea, Brendan and the rest of the lovely staff who helped me set up and feel at home. I so enjoyed teaching a group of people again- I realised midway through just how much I have missed this part of my life. Thank you as well to Lovely Cousin Laura who took a couple of snaps while I was doing my thing!


Because I know people will ask: all these supplies can be purchased through your local art supply store. Here in British Columbia Opus Framing and Art Supplies has five brick and mortar stores- click link for locations- I know from personal experience that staff at all locations should be able to point you in the direction of all items used here. Opus also has a mail order service all across Canada. If you are in the United States try Pearl Paints or Blick Art Supplies- most products or similar will be carried.
good stuff!!!XO
ReplyDeleteIt's like you read my mind!
ReplyDeleteCute so cute that brings smile on my lips....
ReplyDeleteScratch Cards Printing